As of the past weekend, my entire family have been scheming what to cook and eat for Lunar or Chinese New Year. Coincidentally, Chinese New Year falls on the same date as Valentine’s Day this year.
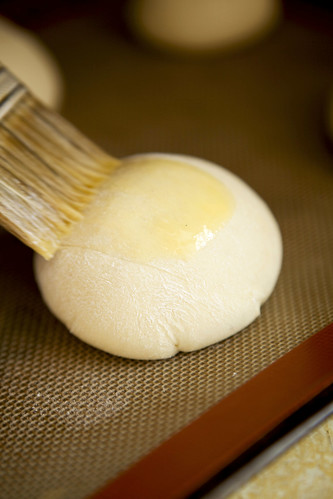
Proofed, filled buns; Brushing on egg
Anyway, as we’re planning out loud what we can do and must do for tradition and for the sake of ambition of tackling dishes we’ve never done. Going along with the latter, my dad and I collaborated the effort of baking cha siu bao-style buns (aka baked Chinese BBQ pork buns) except we’ve replaced the pork filling with house ground sirloin beef. We are planning to do the real cha siu bao around next week so we won’t ruin his delicious roast pork. (Trust me, you haven’t lived ’til you tried my dad’s pork. Unless you don’t like or can’t eat pork, that’s a different story.) The meat filling must be cooked prior to filling it in your bun. We flavored the ground beef with ginger, garlic, and scallions (all finely chopped) and flavored with oyster sauce and black pepper. Let it cool to room temp and proceed working with your large glob of fermented bread dough.
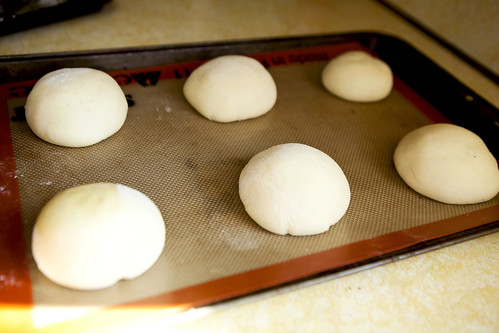
After kneading, cutting the dough, rolling them out like dumplings, filling, wrapping, and proofing (as in letting the buns rise and get puffy), I brush them on with a beaten whole egg. The reason behind the latter is to give the buns a nice glazed look and it helps the browning (caramelizing) process while it’s baking away in the oven.
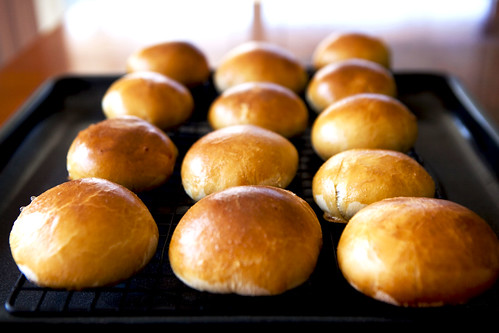
Cooling
What pleasantly surprised me was the fact that these buns actually look…pretty and edible. For some strange reason, I tend to be afraid of baking buns more than a loaf of bread. At any rate, they look gloriously golden brown with a beautiful sheen.
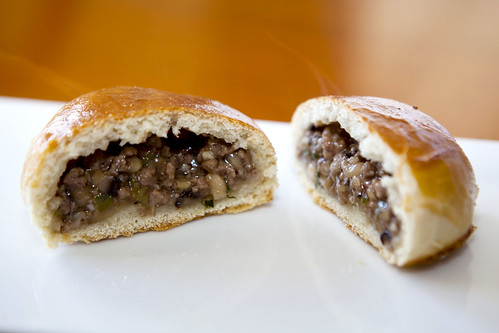
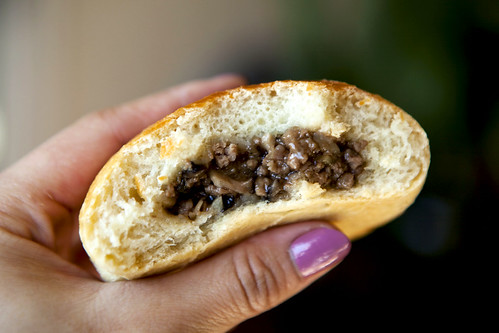
Innards, done two ways
When the buns were chomped by the teeth or cut with a knife, a gentle steam exudes from them, releasing the incredible scent of meat, garlic and a gentle hint of scallion. These were tasty. The modifications I have to do next time is to increase the oven temperature I used and shorten the baking time.
If you’re inclined to bake cha siu bao-style buns (and I urge you to try it), here’s the recipe:
The bun part
Dough portion of the recipe is an adaptation to The Bread Bible‘s Cinnamon Raisin Bread.
To explain, my experience with this particular recipe that I’ve tried for at least three years, it’s a neutral dough. As in, not sweet or salty. It’s versatile enough to work for this bao.
Sponge
Ingredients
4¼ cups plus 5½ tablespoons unbleached all purpose flour (only Gold Medal, King Arthur, or Pillsbury)
2 tablespoons plus 1 teaspoon honey
1½ teaspoons instant yeast
Scant ¾ cup water, at room temperature
1 cup nonfat milk, scalded then cooled to room temperature
1. Mix all the ingredients and let it ferment at least an hour, up to three hours.
Part 2 of the dough
Ingredients
1½ sticks (12 tablespoons) unsalted butter, softened
2¼ teaspoons salt
2. Add the butter and salt to the fermented dough. Mix the dough until it comes together then scrape it down to a floured counter for 5 minutes. The dough should be very sticky. Let it rest for 20 minutes by inverting the bowl that the dough was fermented in. Knead again for another 5 minutes until it is very smooth and elastic. Dough should still be tacky enough to cling slightly to fingers. If it’s still sticky, add some flour. Cover and wrap and allow the dough to relax for 10 minutes. Knead one more time for another five minutes or so in order to develop some gluten. (For bread making newbies, gluten gives you the chewy texture and gives your bread structure. Both are important for bread.) After you’re done kneading, place your dough in a large, (greased with vegetable oil) container and cover it tightly with plastic wrap (greased with vegetable oil on the side where it’s facing the dough). Let the dough rise until doubled in volume.
Meat mixture
Ingredients
1 pound of ground beef
3 ounces of fresh shiitake mushrooms, finely diced (you can use dried shiitakes that’s been rehydrated but gently squeeze out some of the excess water)
1/4 teaspoon finely chopped ginger
2 cloves of garlic, finely chopped
1 scallion, finely chopped
1/2 cup oyster sauce
Salt and pepper to taste (note: you don’t need much salt since the oyster sauce contains a lot of it)
1/4 cup cornstarch slurry (it’s equal parts cornstarch and cold water)
3. Make your meat mixture. Keep in mind, do this quickly since ground beef overcooks quickly. Mix all the raw ingredients (the beef, mushrooms, ginger, scallion and garlic. Heat up your saute pan and add vegetable (or any neutral flavored) oil, when it’s hot enough stir fry your meat mixture until it’s cooked about 70% through since you’re finishing the cooking process in the oven. Add the oyster sauce, salt and pepper. Stir it thoroughly and add your cornstarch slurry until it is a thick mixture (texture like super thick Bolognese sauce). Once it reaches to the desired consistency and salt level, turn off your heat. Dump it onto a bowl or plate and let it cool until it’s at room temperature.
4. Make your dough rounds, fill ’em up, and proof. Dust your counter with flour. Knead the dough gently for a minute. Divide the dough into four rows (approximately the same in size) and start them cutting into 2-inch pieces. Roll them into about 1/8-inch thickness to form the “skins” for the buns. Fill the buns with 1 to 1½ tablespoons of the cooled meat filling and seal up the opening. To create the shape by carefully pinching the edges of the buns and make sure there aren’t any holes. Then invert your bun that it’s the smooth side up. Place your little buns onto a baking sheet lined with parchment paper or Silpat with two inches between each bun. Cover your buns with a slightly damp towel and place it in a warm area. Let it proof for about 1½ to 2 hours, until it looks about
1½ times its original size.
Egg wash
1 large egg plus one teaspoon water
5. Preheated the oven at 375°F for 45 minutes with the broiler pan placed on the bottom of the oven while preheating. Brush your proofed buns with the egg wash. Place the buns into the oven and add a cup of ice to the heated bottom pan and shut the oven door immediately. Bake for 10 to 15 minutes until golden brown. Remove the buns to a cooling rack for a few minutes. Serve.
(If the recipe sounds a bit confusing or if you have a question about it, please comment below and I’ll try to get back to you as soon as possible.)


wow, those look amazing. i’m not a baker so i’d be a bit timid to even try it, even though i want to. we shall see. hehehe
Those are absolutely gorgeous!! I’ll bet they taste just as good as they look…
maomau: Thank you. It’s not so arduous to bake bread but I guess you you’d want to start something simpler if you’re a novice bread baker.
The Lunch Belle: Thanks! They’re really delicious.